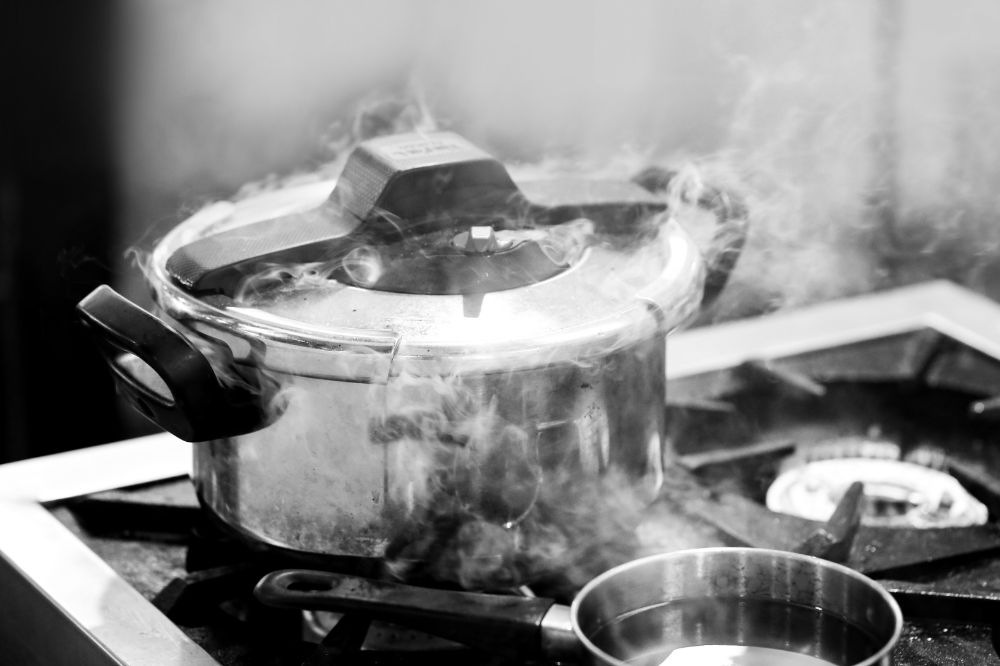
Pressure cookers have evolved into indispensable allies in modern kitchens, capable of conjuring quick, mouthwatering meals with ease.
Yet, amidst the kitchen whirlwind, there’s a familiar culinary stumbling block that can swiftly transform your gastronomic aspirations into a culinary catastrophe. Yes, we’re talking the menacing issue of pressure cooker burn marks on the bottom.
Few things are more frustrating than seeing your meal stick and scorch. To help you out, we'll explore how to stop pressure cooker burning on bottom. We’ll list a range of practical tips and solutions to ensure your pressure cooking experiences are always a success.
Understanding Pressure Cooking
Pressure cooking, like a kitchen alchemist’s secret, relies on science to deliver culinary wonders. It’s all about harnessing steam’s potent power.
When your pressure cooker locks in steam, it cranks up the heat, speeding up cooking times while tenderizing even the toughest cuts of meat. But here’s the catch: maintaining proper temperature control is the wizardry behind avoiding that pesky burning on the bottom.
What Causes Pressure Cooker Burns?
While we enjoy grilled or smoked meats every now and then, we don’t appreciate burnt bottoms on stews and soups. This is where pressure cooking comes in.
Pressure cooking requires a delicate balance to ensure your meals emerge perfectly cooked, without the smoky misadventures. To address the issue, let’s look at its possible causes.
Insufficient Liquid
Imagine preparing a hearty stew in your pressure cooker, but you underestimate the liquid requirement. As the pressure builds, the limited liquid evaporates rapidly, resulting in the bottom layer scorching and the stew becoming a thick, burnt mess.
Incorrect Heat Settings
Ever tried cooking a delicate chicken soup in your pressure cooker, but you accidentally set it on high heat? This excessive heat can cause the soup to stick to the bottom, leading to a burnt layer that detracts from the soup’s overall flavor and quality.
Poorly Sealed or Damaged Gaskets
You’re excited to cook a delicious pot roast in your trusty pressure cooker, but unbeknownst to you, the gasket is damaged. As pressure builds, steam escapes, and the cooker struggles to maintain the desired temperature.
The result? The roast spends too much time on high heat, leading to a burnt bottom layer.
How To Stop Pressure Cooker Burning on Bottom
Pressure cookers are essential for fast, delicious meals, but they can quickly turn your culinary dreams into disasters with burnt bottoms. Here are practical tips to prevent this frustration and ensure successful pressure cooking:
1. Add the right amount of liquid.
When it comes to preventing pressure cooker burning, the liquid you use is your culinary lifeline. The key is finding the perfect balance between too much and too little. Different foods have distinct liquid requirements, so always refer to your recipe for specific guidelines.
Most pressure cooker recipes suggest at least one cup of liquid for effective pressure buildup. However, dishes like rice and grains may need closer to 1.5 cups per cup of grain to avoid sticking and burning.
Remember, many ingredients release their own moisture during cooking. For example, when cooking vegetables or meats, factor in their natural juices. Overcompensating with excess liquid can lead to dilution of flavors and a less satisfying result.
2. Set the appropriate heat levels.
Pressure cookers, at least the digital ones, come with various pre-set functions like high pressure, low pressure, and sauté. Adjust the settings according to the specific needs of your dish.
High pressure is excellent for quickly cooking tough meats, while low pressure suits delicate foods. Sauté mode helps with pre-cooking steps.
Be attentive when it comes to adjusting the heat. Once your cooker reaches pressure, lower the heat to the minimum level required to maintain it. This not only prevents burning but also conserves energy and ensures the food cooks evenly.
3. Maintain and replace gaskets when necessary.
A well-functioning gasket is crucial for a properly sealed pressure cooker, which in turn prevents burning. Check your gasket regularly for signs of wear and tear. Look for cracks, brittleness, or deformities. Even a small defect can compromise the seal.
If you spot any damage, don’t hesitate to replace the gasket. Consult your cooker’s manual for guidance on gasket replacement. Typically, it involves removing the old gasket, cleaning the groove, and fitting the new one securely.
4. Don’t ignore the role of stirring.
For recipes that require stirring, do so before sealing the pressure cooker. This distributes ingredients evenly and prevents them from settling at the bottom, where burning is more likely to occur.
That said, once the pressure cooker is sealed, avoid opening it to stir, as this can disrupt the cooking process.
Some dishes, like soups and stews, require minimal stirring. To prevent burning, use the sauté mode briefly before sealing the cooker to create a protective layer at the bottom. Also, ensure ingredients are adequately submerged in liquid to minimize contact with the cooker's base.
Recipe-Specific Tips
Each type of dish cooked in a pressure cooker demands its own set of precautions to avoid burnt bottoms and ensure culinary success. Follow these tips to make sure your creations turn out perfectly cooked without burnt bottoms:
Rice and Grains
You can cook rice and grains in regular pots, but pressure cooking them means you can do it faster! That said, mishandling rice and grains can lead to a sticky mess. To prevent burning when pressure cooking rice, follow these tips:
Opt for long-grain varieties like Basmati or Jasmine, which are less likely to stick.
Wash the rice until the water runs clear to remove excess starch.
Use a 1:1 liquid ratio for white rice and 1.25 to 1.5 cups of liquid per cup of brown rice.
Add a bit of oil or butter to the rice before cooking to reduce sticking.
Avoid stirring once pressure cooking begins; it can disrupt the cooking process.
Use the low pressure setting for white rice and high pressure for brown rice.
Allow a natural pressure release for a few minutes before opening the cooker to avoid hot steam affecting the rice texture.
Stews and Soups
Given that stews and soups are hearty dishes often prone to sticking, you’ll want to keep these tips in mind to prevent it:
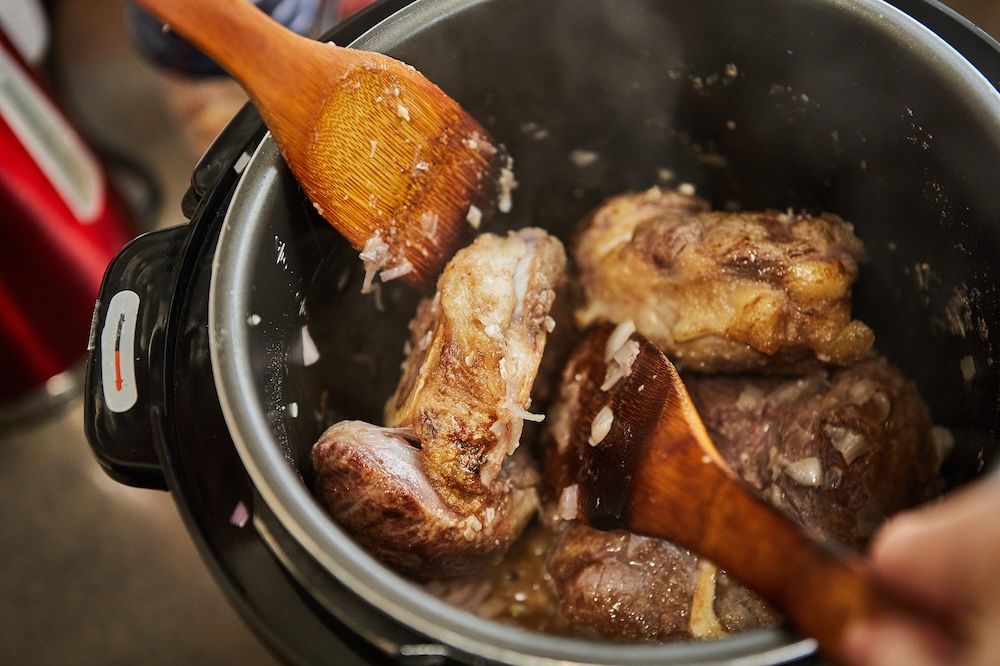
Use the sauté function to brown meat and aromatics before pressure cooking. This creates a protective layer that will help prevent burns.
Ensure there’s enough liquid to fully submerge ingredients, typically following the recipe’s recommendations.
Mix and stir the ingredients well before sealing the cooker to distribute evenly.
Avoid dairy at the beginning. If your recipe includes dairy (like cream), add it after pressure cooking to prevent curdling.
Allow a few minutes of natural pressure release before opening to avoid hot steam disrupting the dish’s consistency.
Check for scorching. If you suspect burning, avoid scraping the bottom; instead, transfer the dish to a clean pot and leave the burnt bits behind.
Meat and Poultry
Proteins can easily scorch if not cooked properly. To avoid this, you can:
Use the sauté function to brown meat before pressure cooking for better flavor and to create a protective layer.
Ensure there’s enough liquid to partially submerge the meat. About one cup of liquid per pound of meat is a good rule.
Avoid overcrowding. Don’t pile meat too high; leave some space to allow even cooking and prevent sticking.
Mix ingredients to coat them with liquid before sealing the cooker.
Select “high pressure” for tougher cuts and “low pressure” for more delicate meats.
Again, allow a few minutes of natural pressure release before opening to preserve meat tenderness.
Vegetables
Vegetables can become overcooked and mushy, leading to burning. Here’s how to stop pressure cooker burning on bottom when cooking vegetables:
Ensure uniform vegetable size for even cooking.
Use minimal liquid. Vegetables release natural moisture, so add only a small amount of liquid (around 1/4 to 1/2 cup) to prevent burning.
Don’t pack too many vegetables into the cooker; leave space for steam circulation.
Instead of boiling, opt for the steaming method when pressure cooking delicate vegetables to maintain texture and prevent scorching.
Avoiding Burnt Surprises When Pressure Cooking
When pressure cooking, avoiding burnt bottoms is a skill that transforms culinary aspirations into delectable realities. Whether you’re whipping up rice, hearty stews, succulent meats, or vibrant vegetables, these preventive measures serve as your culinary safeguard.
The key lies in understanding the nuances of each dish, adjusting cooking times and liquid ratios accordingly, and employing techniques like browning and sautéing.
With these tips, you can confidently wield your pressure cooker as a kitchen ally, turning out dishes that delight the palate without the unwelcome surprise of burnt bottoms.