If you have recently started using a skateboard, you might want to clean and replace its parts at home. And I totally relate to that!
When my son started skateboarding, I decided to look into the parts and how they function. My husband used to skateboard a lot as a kid, and he had all the information about it. He explained the entire mechanism to me and told me about bearings and washers.
Now, changing bearings is necessary when the wheels do not function well, or the skate keeps jerking frequently.
And at this point, you should check if the bearings can be reinstalled after cleaning or do they need to be replaced altogether. In case they do need replacements, you can easily find new bearings at any local sports store or skateboard shop.
So, if you are wondering how to put bearings in skateboard wheels, do not worry anymore. Hi! I am Stacy Smith, and today I will share all my knowledge on this topic in this read.
Without any further ado, dive in!
How To Put Bearings In Skateboard Wheels
Before anything else, I will recommend taking a ½-inch wrench to do the job. Start by removing the gaskets (if the wheels have them) and keep them aside safely. These need to be installed back as soon as you have replaced the bearings.
Step 1: Placing The Wheel
To begin with, you will have to make sure that the wheel is placed on the axle. The bearings should be in slight contact with the axis, but the axis should not be touching the wheel.
Step 2: Remove The Old Bearings
Next, you will have to remove the old bearings for which you will need the wheels to be tilted. Remember that they should be moved at an angle to the suspension axis.
Ensure that you do this process very slowly and carefully, which will make the old bearings slip out without any hassle. Now, if you wish to clean the bearings and put them back, you should keep them carefully in a safe space.
However, you should check them thoroughly to determine the extent of damage or wear and tear. After all, you wouldn’t want to reinstall damaged bearings! Once you remove one of the bearings, repeat the process for all the remaining wheels. In case you are unable to do it by yourself, ask a professional for help.
Step 3: Replacing With New Bearings
If you are going to put back the old bearings, then clean them well before doing so. Otherwise, use new, compatible bearings.
Ideally, the painted side of the bearings should be placed facing outside, but this isn’t a strict rule. You can place it however you want, and it would not affect the functioning of the wheels at all.
Once you have put the bearings in place, apply some pressure on the outer metal ring and slowly lower it down. It should then enter the hole of the bearing easily. You will hear a click sound when it finally attaches in place.
At the same time, make sure that you don’t apply pressure on the center, and. Then just repeat the same method for all the other bearings and place them on both sides of the wheel. This is also the step where you should be attaching gaskets between the bearings and the wheels (if applicable).

- Single, non-contact, removable rubber shield for easy cleaning and less friction
- High speed Nylon ball retainer for greater strength and speed
- Pre-lubricated with Speed Cream racing lubricant
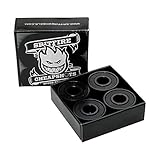
- Others step aside, this is now the standard in base level skateboard bearings that are a step above the rest.
- Spitfire approved for speed. The removable shields keep the crud out, and the durable cage and steel races make for smooth rolling.
- Designed for all types of skating, featuring removable black shields. These bearings are the standard 608 size, which has an 8mm bore which fits virtually every skateboard truck and wheel ever made.
Step 4: Use Washers
Washers are beneficial in reducing friction to allow the wheels spin better and faster. These are smaller rings that are found on either side of the bearings in some skateboards.
If you wish to add them, then push in one washer on the axle followed by the wheel. Then you can install the second washer, and that should work out well. That said, many people do not use washers, so you can skip this step.
Step 5: Place The Wheel
Next, put back the wheels, and you can make them face inwards or outwards. They should be established on a suspension bracket and the nuts then should be tightened. One suggestion that my husband gave me here is to purchase the nuts that come with suspensions. You can find them at any local skates store or sports shop.
You can use a wrench of any size to tighten the nuts. After this, slowly push down the bearings and tighten them as well. Again, don’t apply too much pressure, as that can damage the bearings. I had made this mistake, and then I had to use new bearings to redo the entire process.
Step 6: Loosening The Nuts
After you have fixed and tightened every nut, loosen them a little bit and rotate the wheels to check if you can hear a slight sound. This is a crucial step to ensure that the wheels will be rotating well without any issues. But if there is a loud crackle, then tighten the nuts a little more and repeat the check.
Although this step may take a little time, it’s important that the skateboard functions well in the long run.
Final Words
I will always recommend cleaning the skateboard and its parts regularly to ensure that they last long. The bearings are crucial components and may cause accidents if not maintained well.
In this regard, use proper cleaning agents and follow the steps mentioned on the package. Once they are clean, you can insert them back.
Moreover, you may consider replacing the bearings after a few months or a year if the skateboard is used frequently. After the bearings are fixed, lubricate the parts with 2-3 drops of oil so that the wheels can move smoothly.
I hope that my efforts have helped answer all your queries about putting bearings in skateboard wheels. But if you have any further doubts, let me know in the comments section below.
Until next time!