Gardening doesn’t require acres of land, especially if it’s a dish garden that’s on your mind!
When my newly wedded neighbors decided to give dish gardens as return gifts to their guests, it took me back to my initial gardening days. Curating the first successful dish garden was one of my most cherished DIY projects. But it wasn’t free from errors.
So, when the couple came to me for suggestions, I made it a point to help them out to the best of my abilities. At the same time, I thought it would be a good idea to share my tips and tricks with my readers.
Heya! My name is Stacy, and today, I’ve put together this guide with everything you need to know about dish gardens.
Now, let’s dive in, shall we?
Dish Garden Basics
Caring For A Dish Garden
For starters, a dish garden has the same requirements as any other plant in your garden. With proper watering, sunlight, and maintenance, these miniature ecosystems can become the single greatest attraction of your interior landscape.
That said, it’s not uncommon for first-timers to get a lot of things wrong about caring for a dish garden. Therefore, it becomes important to understand the basics so that you don’t end up ruining the greens.
In the following sections, I’ll walk you through some primary steps to ensure a long and healthy life for the plants.

1. Watering
When you talk about plants, you can’t start without mentioning watering! However, many gardeners do get the jitters, considering the cramped space that houses all the plants. Well, to relieve you of the stress, let me just state that watering a dish garden isn't difficult at all.
For one, most dish gardens are made of plants that have similar care requirements. So, that’s a task cut out right there. However, one crucial thing to keep in mind is that these plants don’t like their roots to be submerged in water. Moreover, the container they’re usually housed in is either made of ceramic or is a basket with a liner, meaning almost zero drainage.
Hence, make sure that overwatering is completely avoided. In this regard, dish gardens thrive with once a week watering, which gives the plants enough time to absorb all the moisture. While smaller dish gardens use less than half a cup of water, the larger ones are likely to require more.
Similarly, you need to adjust the quantity or frequency of watering, depending on the environment. For instance, hot or humid temperatures will demand more water, while cooler climes call for lesser amounts.
At this point, you may be wondering how good it would be to have a moisture meter handy, and I wouldn’t disagree. But even if you don’t, here’s a quick solution to gauge the moisture level. Simply put your fingers into the soil about an inch deep twice a week. If it feels dry, gently sprinkle some water all over the container.
In case it’s moist to touch, wait for a couple of days before rewatering. On that note, if you think you have overwatered, allow the water to seep in for a minute and tilt the container over a sink to get rid of the excess water.
A pro tip: try watering the plant root balls to prevent getting the plants too wet.
Balancing The Water Requirements
Over the years, I have received several dish gardens with a mix of succulents, where the ones with fleshy leaves can store more moisture than others. As a result, I had to water them less than the others. Likewise, a cactus garden will require very little watering; let them get bone dry before the next watering session.
I also like the idea of a European Garden, which is a dish garden where the plants aren’t planted together but left in their pots to be watered individually.
2. Lighting
The amount of lighting required by a dish garden will depend on the plants. Commonly used varieties like peperomia and cactus flourish in medium light, at a bright area near the window. I have placed mine about 10 feet away from the bay window so that it can receive natural light throughout the day.
A common misconception among many homeowners is that placing their plants under direct sunlight will aid the development faster. However, this often does more bad than good by turning the plants yellow.
3. Fertilizing
It’s a no brainer that dish gardens grow slowly compared to the standard indoor garden. Hence, fertilizing is ideally not recommended as it will encourage rapid growth by allowing the buildup of salt and other minerals, thereby shortening plant life. So, many gardeners prefer using high-quality potting soil to do away with fertilizing.
That said, the plants may still require added nutrients. And if the need arises, I’d strongly recommend fertilizing no more than once every spring. You wouldn’t want to fertilize them in late fall or winter, which is essentially a hibernation period for plants.
Liquid kelp, fish emulsion, or any fertilizer with an NPK ratio of 5-5-5 would have the right balance of nutrients. However, don’t forget to dilute them to half strength before applying.
If you want to go all-natural, I’d suggest a light, ¼-inch application of worm compost followed by the same amount of regular compost. Never fertilize stressed plants, i.e., those which are extremely dry or wet.
4. Pruning
Although low on maintenance, dish gardens require some amount of caretaking, primarily in the form of pruning. Over time, you’ll observe the plants growing beyond the container, and that’s the time to prune lightly with a pair of sharp scissors. After a year, the plants will soak up all the nutrients from the soil and will eventually need to be shifted to other containers with fresh potting soil.
Pro tip: It’s advisable to position the plants slightly above the soil line as they will sink a bit.
5. Other Maintenance Needs
Apart from pruning, it’s important to remove the dust and grime that mostly accumulate on the leaves. Not only does the dirt interfere with the natural beauty of the plants, but it also hampers their sunlight intake.
I prefer dusting the leaves with a soft cloth or brush and occasionally flushing the leaves with a sprinkler. Here again, don’t let the excess water stand for too long, as it might lead to irreversible damage.
Beyond that, heavy potting soil will invariably demand more aeration, so consider adding an even layer of perlite or pumice to enhance drainage. And to keep the soil ready from the get-go, opt for a half-and-half mixture of potting soil cactus or succulent mix. Topdressing with too much moss, glass chips, or rocks can cause heavy moisture retention.

How To Build A Dish Garden?
So far, I’ve discussed the key factors to keep in mind while caring for a dish garden. But what if you want to create one of your own? Read on to find the answer…
Step 1: Select The Right Container
In my opinion, the best dish gardens are the ones that have a strong visual appeal. In that sense, I take the liberty of choosing the container first and then select the plants accordingly.
The material will depend on your preference and style, but the most commonly used materials include terracotta, ceramic, wood, raisin, metal, and glass. Head to the local flea market, nearest garage sales, or look up the attic to find something interesting. And no matter which material you opt for, always make sure that the container is adequately shallow.
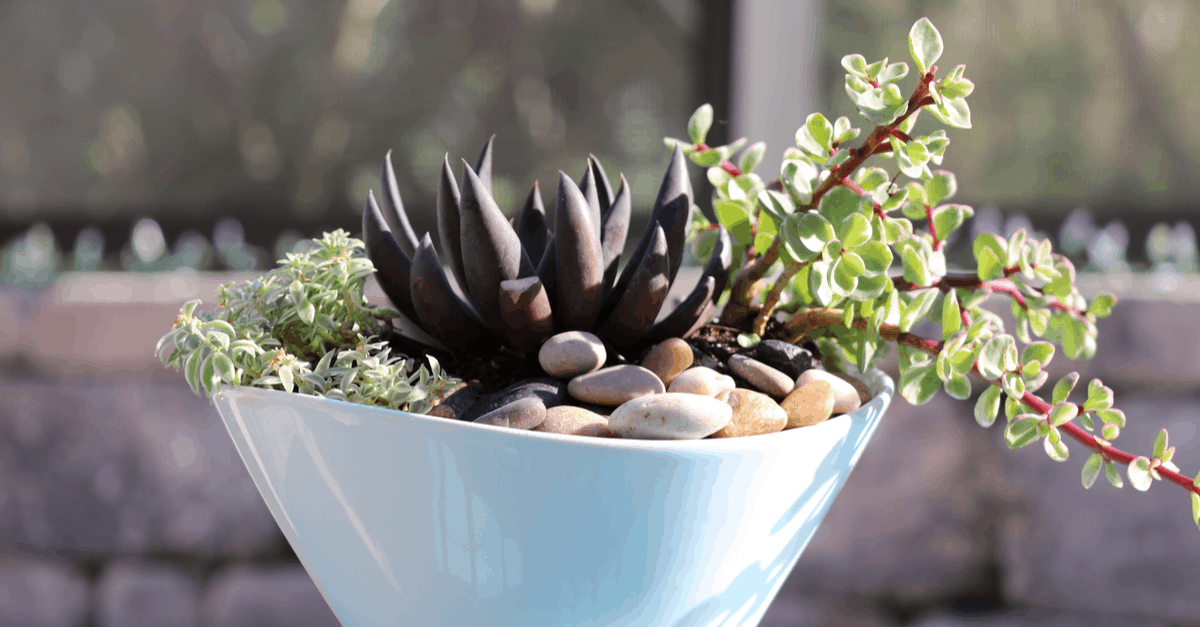
Once you have ticked that off the list, the rest of the process becomes fun, for you’re free to choose any shape and color. For instance, a simple ceramic bowl with a neutral color can be a great choice to add a touch of class to the décor. On the other hand, a blood-red metal canister can be the sizzling focal point against a light-colored wall.
Seek inspiration from your favorite vacation spot, a timeless fairytale, or the current season for the theme. Occasion-oriented dish gardens can even become the centerpiece at weddings!
Step 2: Pick The Plants
Depending on the size of the container, you can choose several plants to the point where the container doesn't become congested. Just ensure they have similar moisture and exposure requirements- that’s the only rule you should adhere to.
Landscaping a dish garden can be done in ways based on the look you’re going for. One of the first dish gardens I received as a gift had different terrain levels, created by combining plants of varying heights. And honestly, I’ve recreated that design so many times now!
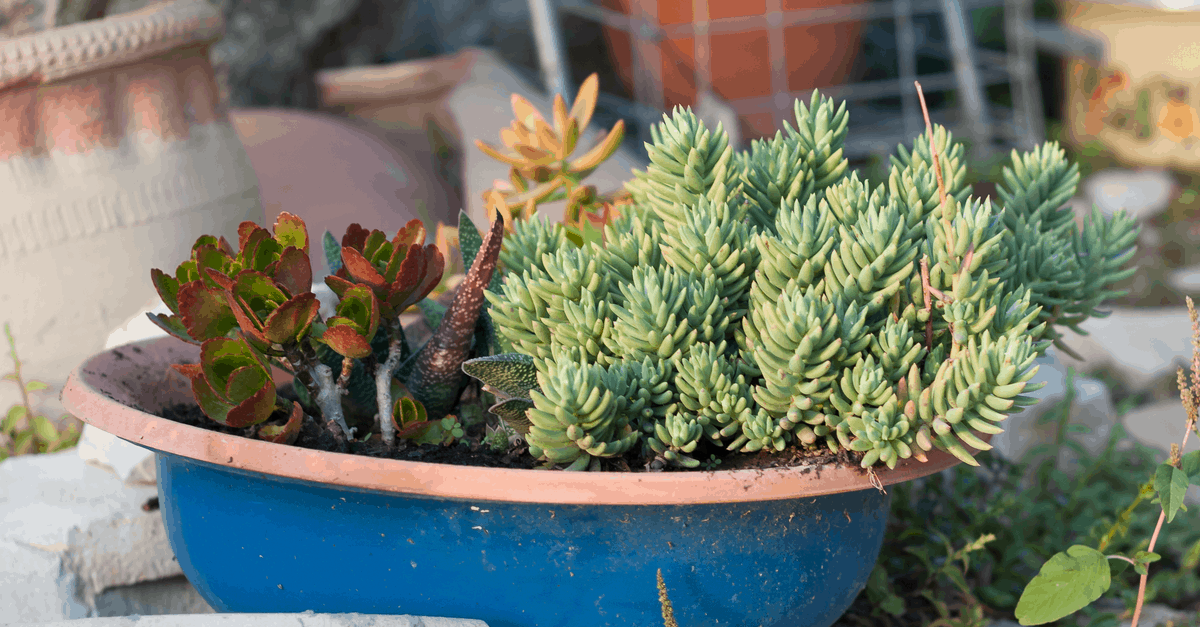
Different leaf textures and colors can also come together to create distinct looks. Succulents, cactus, and other desert plants are popular choices to create contrasting shades and textures in a desert-themed dish garden.
For those of my readers who really aren’t into deserts, try a tropical theme with lush green leaves and stunning silhouettes. Begin by arranging some tall, colorful bromeliads and nullify the sharp edges using the feathery leaves of podocarpus or pteris fern.
You can throw in a couple of pittosporum, croton, or dracaena, whose dark glossy leaves will add tons of drama to the piece. Finally, complete the look by filling in the leftover spaces with shorter and low spreading plants like creeping fig and peperomia.
More Commonly Used Plants
Aside from the above-mentioned varieties, here are some other plants that can be used in a dish garden:
A. Kalanchoes
These flowering succulents have compact colors and are known to add “fullness” to the garden. The graceful clusters of pink, orange, white, or red flowers bloom through the winter months to brighten up the room. Not only that, but they are one of the simplest plants to grow in terms of maintenance.
B. Pothos
Pothos, with their long leafy vines, have a reputation for indoor air purification. The pointed heart shaped leaves make for quite an interesting appearance, while the colors can vary between greens, whites, and yellows. Furthermore, they grow to their full potential in shady areas, making them ideal for home or office environments.
C. Dieffenbachia
The streaky green and white leaves of dieffenbachia can incorporate some much-needed contrast in your garden round the year.
D. Poinsettia
How about breaking the monotony of the healthy green foliage with a vibrant blooming poinsettia? Mini-poinsettias demand very little attention and can survive indefinitely in appropriate environments.
E. Spathiphyllum
Also referred to as “peace lilies”, these plants bloom in spring to offer long-lasting flowers that rest on the leaves over the thin stalks. Plus, they require conveniently low moisture and light for optimum survival.
Step 3: Adornments
I can’t think of a better term than “sky's the limit” to describe the process of accessorizing your dish garden. From miniature figures to seasonal props and abstract elements like pebbles or stones- I can go on and on. Feel free to go crazy!
Step 4: The Final Assembly
Now that you have everything in the vicinity, it’s time to assemble your garden. Start by sprinkling less than an inch of gravel and charcoal on the bottom of the container. While the gravel helps in drainage around the roots, the charcoal keeps the standing moisture fresh.
Next, position your plants according to the design or pattern you have in mind. Concentrate the soil deposition near the root-balls and leave a thinner layer over the non-planted gravel areas. Finally, tuck-in the decorative items with a top-dressing of moss or sand to conceal the bare soil.

Final Words
There you have it- everything about dish gardens.
Caring for a dish garden will turn you into a gardener even before you realize. And trust me, there’s no better stepping-stone for the rewarding journey of gardening. So, you might want to ditch the idea of buying a ready-made second dish garden!
With that, it’s time for me to wrap up today’s proceedings. But before that, I’ll leave you with a last pro tip: since the garden will be seen from all sides, put the taller plants in the center. Otherwise, place them on the side that will be on display.
I’ll be back with more such content. Till then, stay safe and happy gardening!
