To maintain a garden in pristine condition, a user needs the right tools.
Among them, lawn mowers play an important part in trimming the grass to the correct height, promoting healthy grass growth. Call me old school, but I still operate a lawn mower with a pull cord, just like how my dad used to. However, there are issues with using these machines, as I found out the hard way.
Last week, when I took it out of the shed, I failed to get the engine running. No matter how much I tried or pulled the cord, it just wouldn't start. I checked the inner components and found that the rope had snapped.
This is a common problem seen in most lawn mowers with pull cords, but being ignorant, I thought maintenance would save me from the trouble. After a quick internet search, I noted down all the steps and began my work to fix it. I'm happy to report that my lawn mower has been working well ever since. Hi! I'm Stacy Smith, and today I'll share my findings in this guide on how to fix lawn mower pull cord units.
How To Fix The Lawn Mower Pull Cord?

Materials Required
Before discussing how to fix the pull cord, I will mention the materials required for fixing it. You'll need a 4-in-1 screwdriver, leather gloves, a nut driver, needle-nose pliers, and a new pull rope. Once you have everything ready, start the repair.
Steps To Follow
For your benefit, I've narrowed down the essential steps below, and you can note these to get a better understanding of what to do.
1. Removing The Rewind Assembly
To begin with, you'll have to remove the old pull rope for which you need to take out the rewind assembly. Depending on the model, the components of this assembly may vary, but it's usually held together by three or more screws.
Sometimes, instead of the rewind assembly, lawn mowers come with a shroud, covering the top half of the unit. It's also held in place by screws, so the manner of removal remains the same. However, in some cases, users may find that the shroud or assembly has no screws. What should you do then? Read on.
2. Removing The Old Rope
If there are no screws, you'll find rivets holding down the shroud or rewind assembly. To access it, you'll have to remove the bolts holding the shroud, thereby exposing the rivets. If they are loose enough, you can remove the rivets with a drill and replace them with bolts and locknuts.
Once you've accessed the rewind assembly, flip it over to find the broken end of the pull cord. Since it's still knotted, you can easily grab it with the needle-nose pliers and then remove the old rope.
Ensure that there is no debris in the hole, as you'll have to reattach the new rope to this cavity.
3. Aligning The Components
Prior to installing the new rope, it's important to turn the rope pulley in the same direction it rotates when you pull the power cord. If the pulley gets harder to rotate with each turn, know that you're on the right track. Keep turning until the increased resistance makes it difficult to rotate it further.
Now, release the pulley and let it turn back 1-1½ revolutions, ensuring that it lines up with the rewind housing hole. This makes it easier to thread the new rope, so use a screwdriver and wedge it into the gap, preventing it from turning further.
4. Burning The Ends
I learned a neat trick which I want to share with you. To make installation easier, you can burn one end of the rope with a match. Remember to wear your leather gloves while doing this and wait for the rope to melt. As the plastic gets hotter, twist it to create a pointed end. This will make it easier to thread the rope.
5. Threading The Hole
Push the pointed end of the rope through the opening and tie a knot. While tightening, you can heat the knot slightly and pull on it, preventing it from coming loose. Next, remove the screwdriver gently but make sure you press down on the pulley with your finger.
Slowly, let the pulley rotate back, taking the rope with it to wind its way all around the pulley system. Once you're satisfied with the installation, cut off the excess rope and ensure that all the components are in place. But the job's not done yet.
6. Tying The Knot
After arranging the components, tie the rope to the handle and remember to make a knot. You'll have to position the knot precisely, ensuring that you experience a slight tension on the rope while releasing the handle.
Sometimes, the rope may extend up to the handle, for which you’ll need to place the handle in its final position. This will make it easier to get the correct tension while tying the knot.
Ensure that when you release the pulley, it winds the rope back to the rewind position. All said and done, reattach the rewind assembly and the shroud, tighten the screws, and then clean the surface.
7. Test Run
Fire up the engine to check that everything is working. If you follow the steps correctly, it shouldn't take too long to get the lawn mower running.

- Number: 593959 593960 Pull Recoil Starter kits
- Replaceable parts: 590588, 591139, 593961
- Applicable engine models: 08P502, 093J02, 09P602, 09P702 models
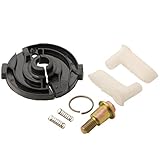
- Rotary Brand Parts
- Replacement for Part Number 692299, 557058, 492333, 281505, 281503
Final Words
That’s all there is to know about fixing the pull cord on a lawnmower; it’s time now for me to take your leave.
But before that, here are a few additional tips: While purchasing the new rope, it’s important to have adequate knowledge regarding the lawn mower model. My neighbors have had problems with the rope thickness, wherein it didn’t fit. Also, stick to the same rope material and don’t try anything fancy.
Whenever in doubt, feel free to consult my guide and keep all the materials ready beforehand. Take care and see you soon. Bye!